How to Free Up Space In Your Computer Automatically with a Batch File
How to Free Up Space In Your Computer Automatically with a Batch File
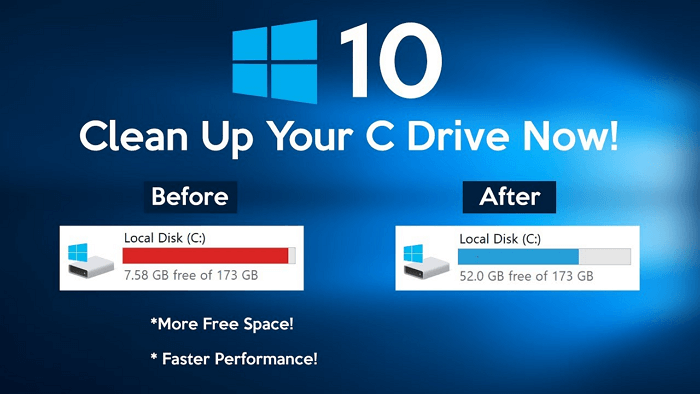
Is your Computer is running out of space? Try the following simple trick. One of the easiest and most effective ways to free up space on your computer is by deleting temporary files that accumulate over time. Instead of doing this manually you can automate the process using a batch file. I'll show you how to create a simple batch file to clean up your system and regain valuable disk space automatically when click on the batch file.
What is a Batch File?
A batch file is a script file that contains a series of commands executed in sequence have the extention .bat . It’s a powerful tool for automating repetitive tasks in Windows. For this task we’ll create a batch file that deletes unnecessary temporary files and directories automatically.
Step-by-Step Guide to Creating the Batch File
Follow the following steps to create your batch file:
1. Open Notepad:
- Press `Win + R`, type `notepad`, and press `Enter`.
2. Copy and Paste the Script:
- Copy the following script and paste it into Notepad:
batch
@echo off
echo "Script by CHXRITH"
del /s /f /q %windir%\temp\.
rd /s /q %windir%\temp
md %windir%\temp
del /s /f /q %windir%\Prefetch\.
rd /s /q %windir%\Prefetch
md %windir%\Prefetch
del /s /f /q %windir%\system32\dllcache\.
rd /s /q %windir%\system32\dllcache
md %windir%\system32\dllcache
del /s /f /q "%SystemDrive%\Temp"\.
rd /s /q "%SystemDrive%\Temp"
md "%SystemDrive%\Temp"
del /s /f /q %temp%\.
rd /s /q %temp%
md %temp%
del /s /f /q "%USERPROFILE%\Local Settings\History"\.
rd /s /q "%USERPROFILE%\Local Settings\History"
md "%USERPROFILE%\Local Settings\History"
del /s /f /q "%USERPROFILE%\Local Settings\Temporary Internet Files"\.
rd /s /q "%USERPROFILE%\Local Settings\Temporary Internet Files"
md "%USERPROFILE%\Local Settings\Temporary Internet Files"
del /s /f /q "%USERPROFILE%\Local Settings\Temp"\.
rd /s /q "%USERPROFILE%\Local Settings\Temp"
md "%USERPROFILE%\Local Settings\Temp"
del /s /f /q "%USERPROFILE%\Recent"\.
rd /s /q "%USERPROFILE%\Recent"
md "%USERPROFILE%\Recent"
del /s /f /q "%USERPROFILE%\Cookies"\.
rd /s /q "%USERPROFILE%\Cookies"
md "%USERPROFILE%\Cookies"
3. Save the File:
- Click on `File` > `Save As`.
- In the "Save as type" dropdown, select `All Files`.
- Name your file `cleanup.bat` and save it to a location where you can easily find it, like your Desktop.
4. Run the Batch File:
- Navigate to where you saved the `cleanup.bat` file.
- Right-click on the file and select `Run as administrator` to execute the script with the necessary permissions.
Understanding the Script
Here the breakdown of what each part of the script does:
- `@echo off`: This hides the commands as they run, keeping the command prompt window cleaner.
- `echo "Script by CHXRITH"`: Displays a message to indicate who created the script.
- `del /s /f /q <path>`: Deletes files in the specified directory.
- `/s`: Deletes files from all subdirectories.
- `/f`: Forces deletion of read-only files.
- `/q`: Quiet mode, does not ask for confirmation.
- `rd /s /q <directory>`: Removes directories.
- `md <directory>`: Creates directories.
Benefits of Using This Script
1. Efficiency: Automates the cleanup process, saving you time and effort.
2. Disk Space: Frees up disk space by removing unnecessary files.
3. Performance: Can improve system performance by reducing clutter.
Precautions
- Backup Important Data if you modified the code i gave: Ensure you have backups of important files, as the script deletes files permanently.
- Modify with Caution: Only modify the script if you understand the commands to avoid accidentally deleting important system files.
Using this simple batch file, you can keep your PC clean and running smoothly without manual intervention. Feel free to customize the script to suit your specific needs and enjoy a clutter-free system!
If you have any questions or need further assistance, leave a comment below! Happy cleaning!

Comments
Post a Comment